
Block an IP Address in CSF via WHM.
1. Log in to WHM:
Enter your WHM root credentials and log in.
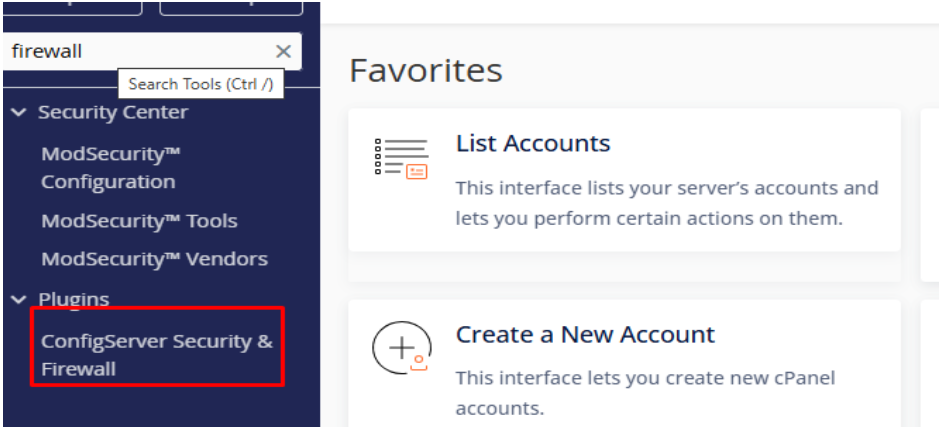
2. Go to “ConfigServer Security & Firewall” (CSF):
In the WHM search bar, type “Firewall Configuration” or “ConfigServer Security & Firewall”.
Click on it from the search results.
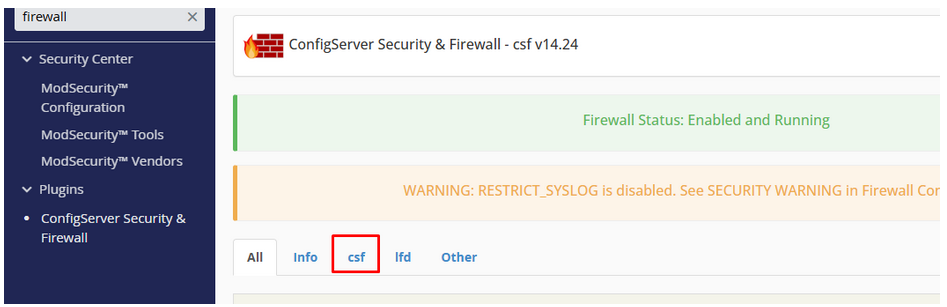
3. Click on csf:
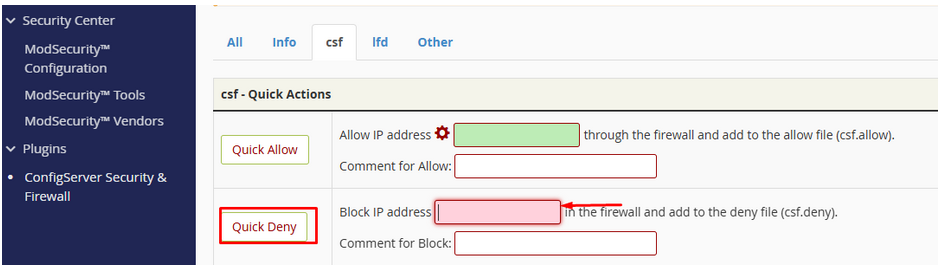
4. Find the “Quick Deny” Section:
Under Firewall Management, look for “Quick Deny”.
5. Enter the IP Address to Block:
Type the IP address you want to block (e.g., 192.168.1.100).
(Optional) Add a reason for the block.
6. Click “Quick Deny”:
The IP will be immediately blocked by CSF.
Unblock an IP Address in CSF via WHM:
1. Follow Steps:
Follow steps 1-2 Above to open CSF Firewall.
2. Go to “Quick Unblock” Section:
Once inside the CSF dashboard, scroll down or look in the menu for “Quick Unblock”.
Click on it — this section allows you to quickly remove IPs that are blocked by the firewall.
3. Enter the IP Address You Want to Unblock:
In the field provided, type the full IP address that you want to remove from the blocklist.
Double-check the IP to ensure accuracy.
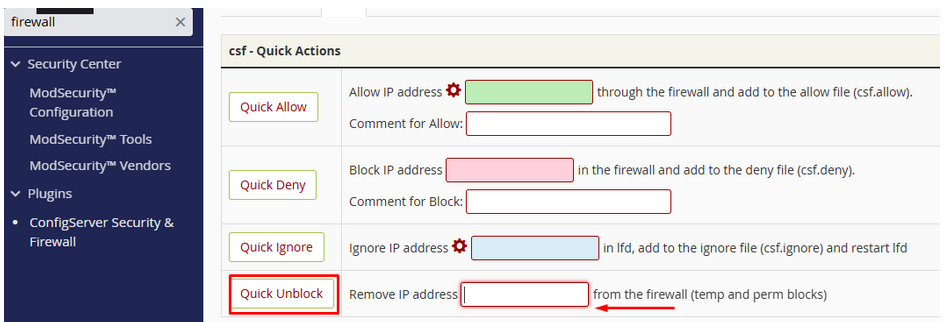
4. Click “Quick Unblock”:
After entering the IP, click on the “Quick Unblock” button.
CSF will then search its deny list and, if found, remove the IP from the blocklist.
✅ Result
The selected IP address will be unblocked immediately.
The user or service associated with the IP should now regain access to your server.