
1.Log in to WHM:
Open your browser and go to https://your-server-ip:2087 or https://yourdomain.com:2087.
Enter your root credentials to log in to WHM.
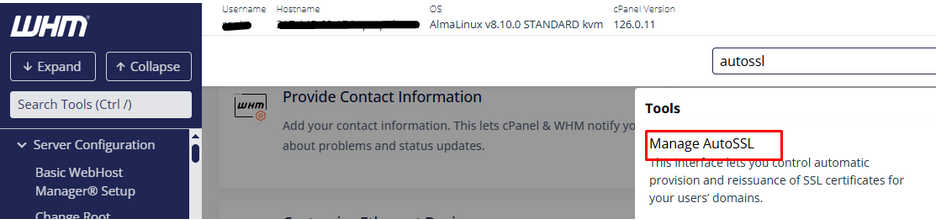
2.Navigate to AutoSSL Settings:
In the left-hand search bar in WHM, type AutoSSL.
Under the SSL/TLS section, click on AutoSSL. Alternatively, you can go to Home > SSL/TLS > Manage AutoSSL.
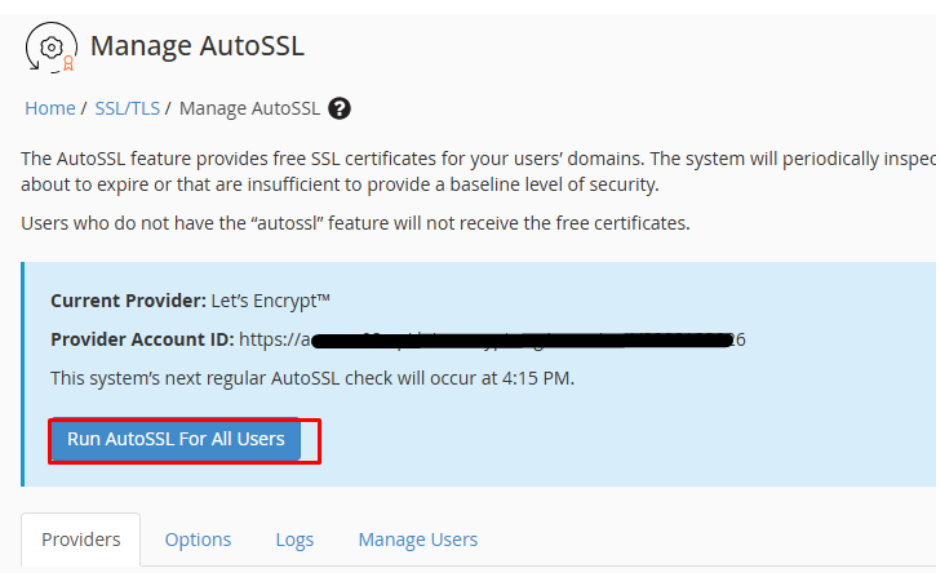
3. Enable AutoSSL for All Accounts:
in the Manage AutoSSL page, you’ll see an option to Enable AutoSSL. Make sure this is turned ON.
By default, AutoSSL uses cPanel’s built-in provider, which is Let’s Encrypt. If you want to use another SSL provider, you can change this in the AutoSSL Settings section.

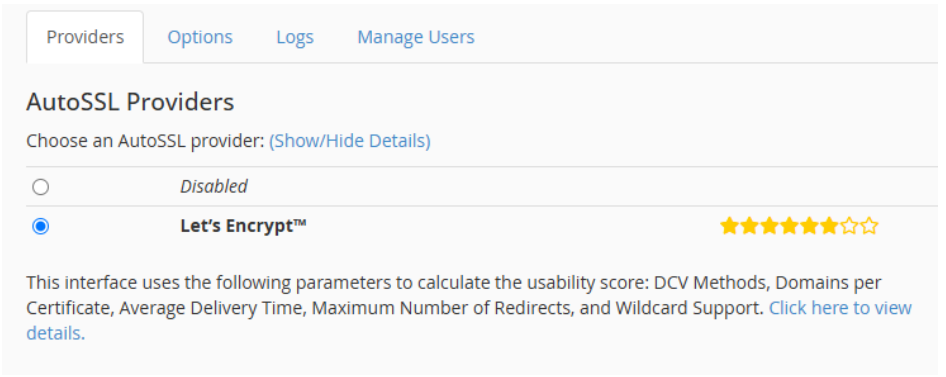
4. Choose AutoSSL Provider:
Under the AutoSSL Providers section, select the provider you want to use.
5. Enable AutoSSL for All cPanel Users:
Make sure the Allow AutoSSL to replace invalid or expiring non-CA SSL certificates option is checked. This will ensure that any invalid or expired SSL certificates are automatically replaced by AutoSSL for all accounts.
Additionally, make sure that Check AutoSSL for all accounts is selected to automatically apply AutoSSL to all current and future cPanel accounts.
6. Save Changes:
Click Save to enable AutoSSL for all cPanel accounts on your server.