1. Log in to cPanel:
Go to your cPanel login page (typically something like yourdomain.com/cpanel).
Enter your username and password to log in.
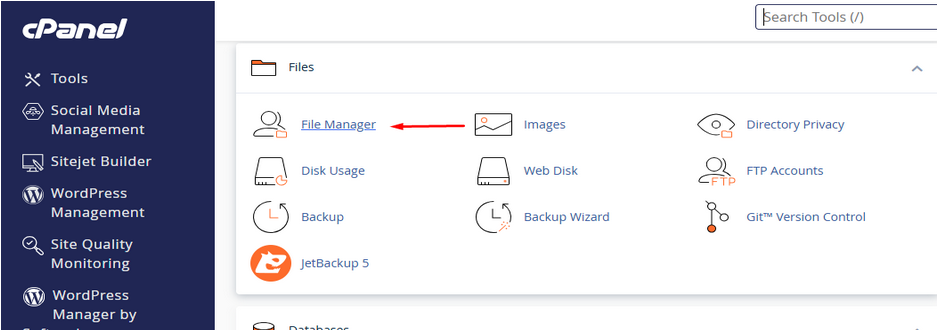
2. Open File Manager:
In the cPanel dashboard, scroll down to the Files section.
Click on File Manager
3. Navigate to the Directory:
Just like when creating a folder, navigate to the directory where you want to create the new file.
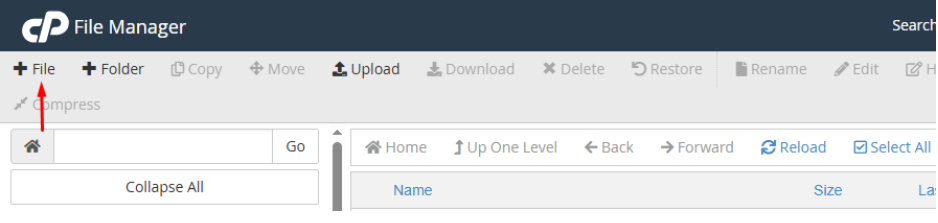
4. Create the File:
Click on the + File icon at the top of the File Manager.
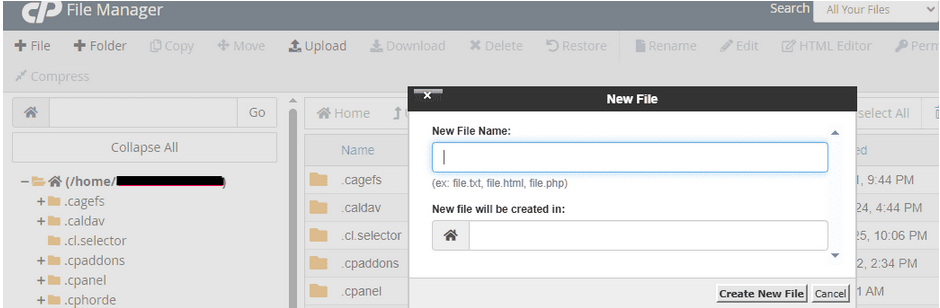
A dialog box will pop up asking for the name of the new file. Enter the name and make sure to include the appropriate file extension (e.g., .html, .php, .txt).
Click Create New File.
5. Edit the File (optional):
After creating the file, you can right-click on it and select Edit to open the file in the editor and add content.
Creating a Folder:
1. Navigate to the Desired Directory:
In the File Manager, you’ll see a directory tree on the left. Navigate to the location where you want to create the new folder (e.g., public_html or another directory).
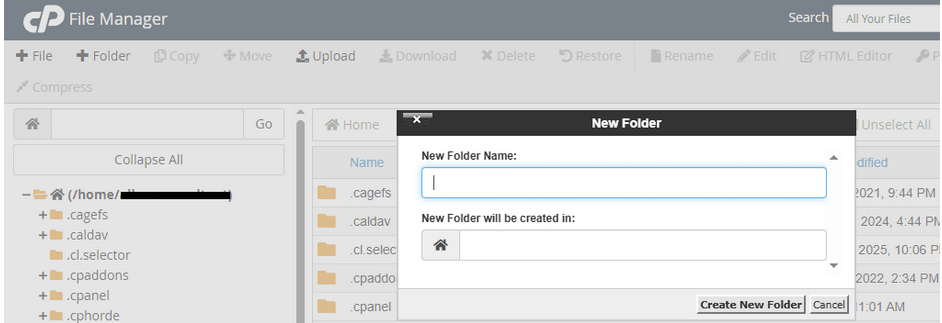
2. Create the Folder:
Click on the + Folder icon at the top of the File Manager.
A dialog box will appear where you can enter the name of the new folder.
After typing the folder name, click Create New Folder.

3. Organize and Manage (Recommended):
After creating your folder, make sure it’s in the correct directory.
If needed, right-click it to rename, move, or set permissions using Change Permissions. This helps keep your File Manager clean and structured.