1. Log in to cPanel
Open your web browser and visit your cPanel login page. Eg. (yourdomain.com/cpanel).
Enter your username and password to access your hosting dashboard.
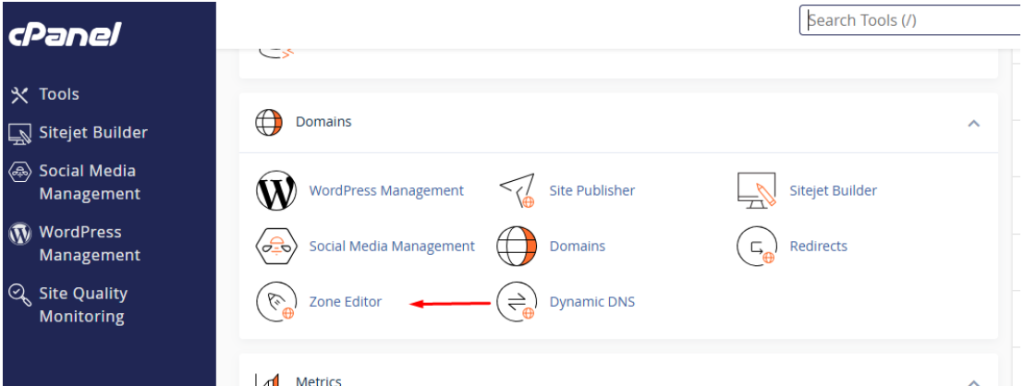
2. Navigate to the DNS Zone Editor
In the cPanel dashboard, scroll down to the Domains section.
Click on Zone Editor.
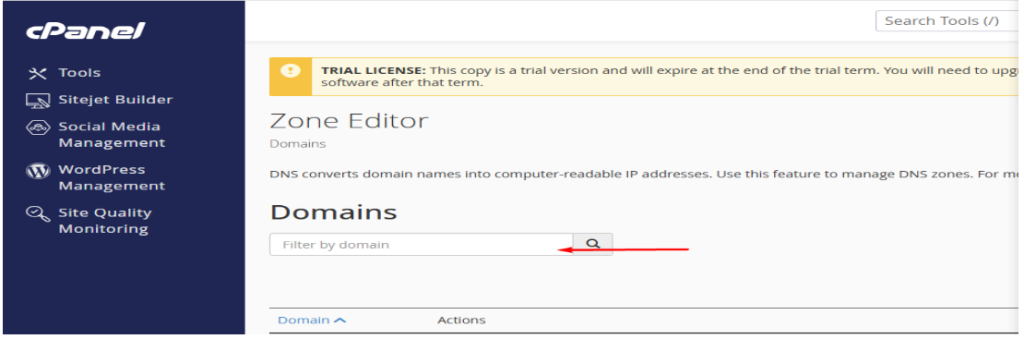
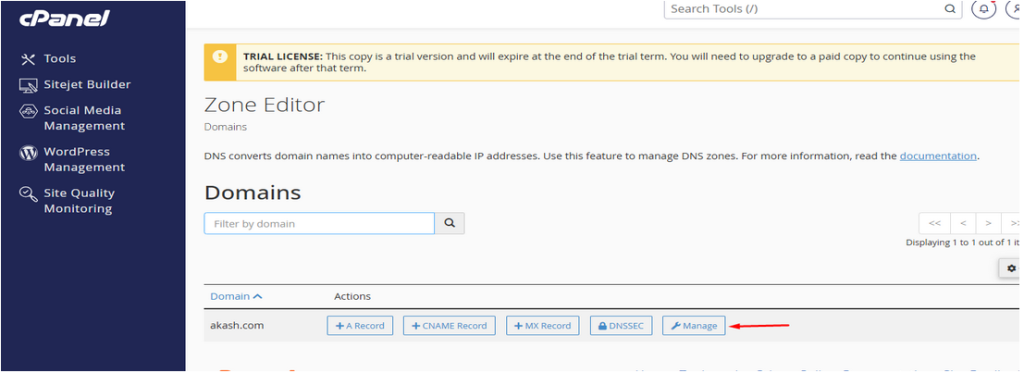
3. Select the Domain
On the Zone Editor page, you will see a list of domains under your account.
Find the domain you want to add a DNS record for, and click on Manage next to it.
4. Add a DNS Record
On the Manage page, you’ll see an option to Add Record at the top.
Click on + Add Record to create a new DNS record.

5. Choose the Record Type
You’ll be prompted to select the type of DNS record you want to add. Common record types include:
- A Record – Points a domain or subdomain to an IPv4 address.
- CNAME Record – Redirects one domain to another (useful for www redirection).
- MX Record – Configures mail routing for your domain.
- TXT Record – Adds text information for verification purposes, like SPF or DKIM.
- AAAA Record – Points a domain to an IPv6 address.
Select the appropriate record type based on your needs.
6. Enter the Record Information
For each type of record, you will need to enter different details:
A Record:
- Name: Enter the subdomain (e.g., www, or leave it blank for the root domain).
- TTL: Leave the default or set a custom TTL (Time to Live).
- Type: Choose A.
- Address: Enter the IP address you want your domain to point to.
CNAME Record:
- Name: Enter the subdomain you want to alias (e.g., www).
- TTL: Leave the default or set a custom TTL.
- Type: Choose CNAME.
- CNAME: Enter the target domain (e.g., example.com).
MX Record:
- Name: Leave blank or enter the domain.
- Priority: Enter a priority (lower values are higher priority).
- Mail Server: Enter the mail server’s domain (e.g., mail.example.com).
TXT Record:
- Name: Enter the subdomain (leave blank for root).
- TTL: Leave the default or set a custom TTL.
- Type: Choose TXT.
- TXT Data: Enter the text value (e.g., SPF or DKIM value).
6. Save the Record
After entering the necessary details, click Add Record or Save to add the DNS record.
7. Wait for Propagation
Like all DNS changes, it may take anywhere from a few minutes to 48 hours for the new record to propagate across the internet.